Let us see how to build Google Forms online from scratch for all your business requirements.
Google Form Design
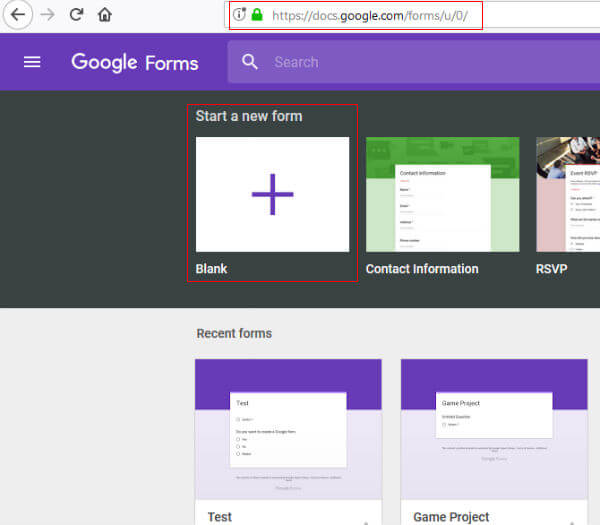
Once the form questions are finalized, go to Google Forms page and start a new one. If you are not logged in, it will prompt for the same. The first task is to assign a name to the form for identification. Also, you can add a description there to enlighten about the function of the form to the user.
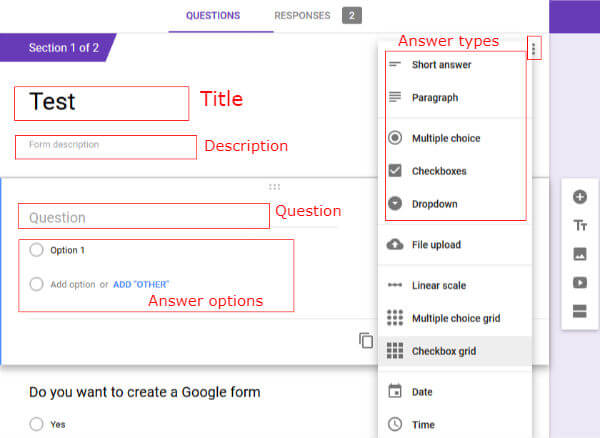
Now, insert the questions one by one and select the proper answer fields from the drop-down design menu. You may also insert sections and image/video to enhance the visual appearance of the form.
Sections are used to split the questions into different windows that will appear only after the “Next” button in the form clicked while running. You can also move or delete the questions by clicking on that individual object setting icon. Also read: Easy to Find out your LPG Cylinder Booking Status Online
Form Preview or Debugging
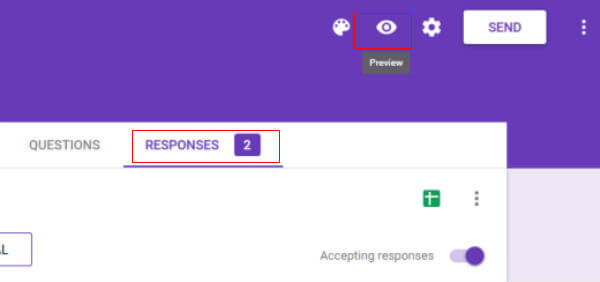
As soon as the questions and answer fields are inserted, the form is ready to accept responses from the user. You can test the appearance and function of the designed form by clicking on the “preview” icon (eye). We can find out the design errors using it. Also, it allows checking whether the form is accepting response properly.
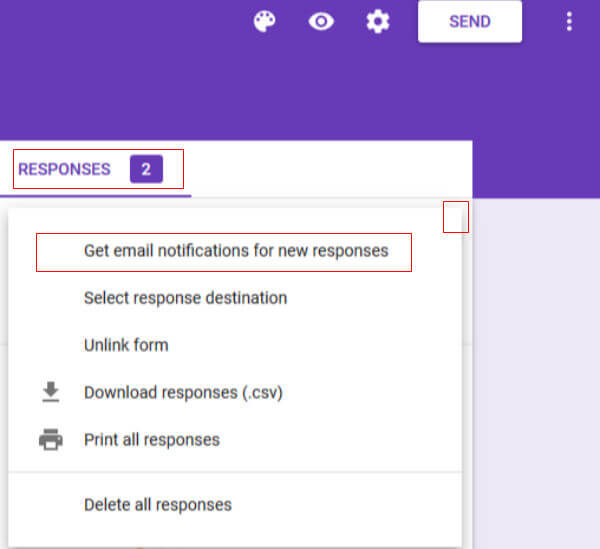
The form responses will show summary and individual answers to the questions asked. If you want to get a basic notification about the form responses, click on the “settings” (3 dots) button and select “Get email notifications for new responses”. It will just give an alert that you have received a response. If you want to receive the whole response directly as email, read on our next article which will cover the settings for that.
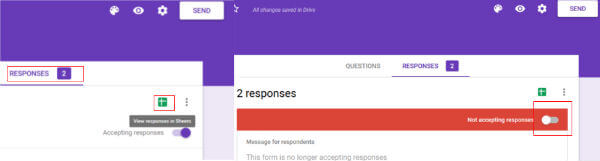
The form responses can export easily to spreadsheet format in Google Sheets for further analysis and backup. For this, go to preview mode and select the response tab. There we will find the Google sheet icon to export as a spreadsheet. Click on that and either create a new spreadsheet or choose an existing one to append data.
Once the spreadsheet selected or created, the spreadsheet will open directly by next time when you click on the icon. If you found the form is not yet ready to accept responses, move the slider button towards “not accepting responses” as shown in the image.
Preparing Short Link for Publish/Share
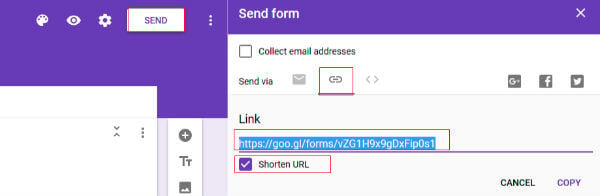
Your basic form is now almost ready to accept the responses. Now, we will get a short link of this so that it can be shared with the users on your website or email, etc. If your form is not needed pre-filled values, click on the “Send” button. It will open a send form window. In that window, click on the link icon and check the “Shorten URL” box. You will get the shortened URL that can be made public for accepting responses from users.
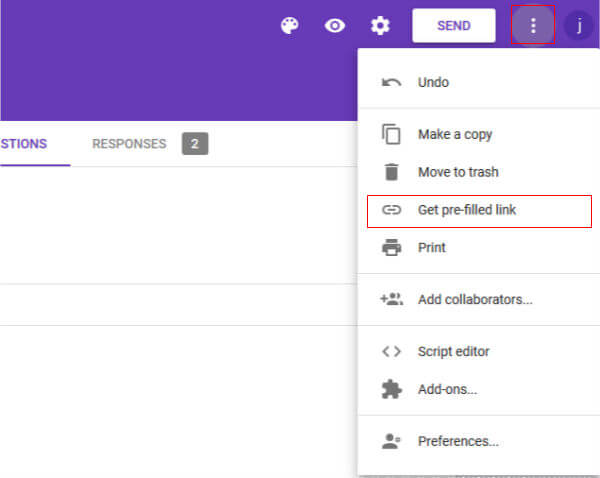
If your form is to be pre-filled with default values, click on the “settings” icon (3 dots) near to the send button. There you will get the option “get pre-filled link” and click on it.
Your form will open in a new window with the option to pre-fill the answers. Pre-fill the values and click on “Get link”. You will get the link that we need to copy by clicking on it.
Setup Google Forms Online
Forms are an integral part of any business in this latest century. It is used to collect various data from the users or applicants for further processing. The past era of paper forms is a paved way to the digital forms in this century. And Google is doing great with the Google Forms service that they offer. Google Form is a part of the Google Apps for a Business suite and might be requiring a paid subscription in higher usage. However, it is available for free to the small and general users that most of us are not making use of it. More details about the Google Apps for Business are available here. Google forms are very simple to create and can be used by everyone. The forms and responses will be saved into the Google drive and readily available to you for all your devices. It is taking much less space on your drive so that multiple forms and response sheets can be saved and used as you wish. Almost all of the sections are customizable in the form so that each form can be given a unique look as per your imagination.
Δ